Monday, May 21, 2007

Wedding Gifts

I was so upset, I wasn't able to make it to Amber (Chip's cousin)and Matt's wedding. I imagine it was absolutely beautiful, and I wanted to be there so much! But my back has been out for over a week now, and even though the chiropractic adjustments are helping, I'm still in a good bit of pain. Since Chip had to work, I would have had to make the drive myself, and it was over an hour away. I just didn't feel I could do it and then have Ruthi hanging off me and keep a smile on my face. I just wouldn't have been able to enjoy myself and would have probably been in even more pain on the way home. I hate that I had to miss it, but I did have to do what was best for me. (Wow - that sounded kinda selfish - but you know what I mean!)

Anyway, I made their wedding gift, and didn't want to wait till who knows when to give it to them, so the cousin who lives down the road from me took it for me. (Thank you Cathy!!)

With limited funds for a gift, I decided to make something. Sure, I could have spent the little bit that it cost me to buy the frame and supplies (which wasn't much, because I had most of it on hand) and bought something from their registry, but it would have been such a small 'something', that it actually made me feel cheap! Of course there was Chip's argument that people register for things they want/need and probably look forward to getting those things. I know this is true (I loved getting things from my wedding and baby registries), but I also know how much I cherish the things that were hand made or personalized, and things that were unexpected. So, I am hoping that they will like and appreciate what I made. So here it is:

I made a name frame that they can put at their front door (or anywhere they like for that matter.)


I had checked out their registry, and from what I could tell, they had a lot of neutral colored things picked out. That is why I decided to go with the browns/neutrals. It doesn't show up well in the photo, but the little heart above the name has "The" written in it.
I didn't have any stamps large enough to stamp the letters, so I printed the letters onto cardstock from MSWord and cut them out with a craft knife to make a template, in which I chalked in the color. The little square underneath says "est. 2007" using rub-on letters from TLC. The metal charms I had on hand, and everything else came from Michael's.
I wish I had taken the photo without the glass so there wouldn't be a glare, but I didn't, so oh well! This is the first name frame I've made, and I'm pretty pleased with how it came out. I plan to make one for myself now! I really do hope they like it.

**(Edited to add: You can click to see the picture larger. When I did this, I noticed that the little rhinestones in the heart appear to be colored. They are not - that is just the way the light is reflecting off them. And goodness, you can see my hands and my computer screen in the glass - LOL!)

I also made a set of 10 monogrammed note cards. I was going to make them Thank You cards, but decided against that so they can be used for other reasons as well. I used the same papers/colors as I did for the wedding card, pulling from the colors of their wedding. I know that she was going to have lavender, and I'm not sure if this is the shade, but since it doesn't have to match the wedding, I figured it didn't matter that much.


The 'N' and the little flourish in the corner are embossed with silver Super Fine Detail embossing powder by Ranger. (I love this stuff!) And though I didn't take a picture, I dressed the envelopes up just a little by stamping the same flourish on the front in the bottom left corner, and stamped an "N" on the back flap. I made a band from the black cardstock and layered a thinner band in the purple on top of that, and wrapped it around the set. Then I tied it with the same ribbon. And of course, I didn't get a picture of that either! But I hope they like these as well.

I think I've already set my all-time high for making cards this month, as I've already made over 40, and I still need to make a few more! Phew! Maybe in June I'll get to sleep again! (Yes, late at night is when I work best and get most of this stuff done - with no interruptions!)

Saturday, May 19, 2007

Mother's Day Cards

This is the card I ended making for my Mom for Mother's day. I was inspired by many I've seen using the flower for the "O".


I wouldn't typically pick greens for this kind of card, but I started with this flower, and that's just how it turned out. I stamped the background with one of the stamps from the Looks Like Spring set by Stampin Up, using a clear embossing pad, and then embossed it with transparent powder. I used my Fiskars shape cutter for the m's and matted them with white. The ribbon came from Michael's.
I decided to do a long card, because with the size of the flower, it was too crowded to do a smaller one. My Mom really liked it. And, both Mom's really liked their gifts!

I also made for each of them a set of cards and a tote to hold them. I used the "one sheet wonder" (OSW) method, where I used a sheet of patterned paper cut up in different sizes/shapes and used it in different ways on the cards. I kept them all pretty simple.

For the first set I found instructions with measurements for a OSW and used it as a guide. You can see the original here, and the instructions and measurements for the tote and the cards here.


I was also inspired by another SCS'er for this set, but I can't find the link. I thought I had saved it, but apparently I didn't. If I can find it, I will come back and add it.


This second set actually ended up with 10 cards in it, but somehow, one of them didn't make it into the picture. (You can click the pictures to view larger.)

Thursday, May 17, 2007

Magnet Frames and Tissue Boxes

I can finally post the things I made for Mother's Day since both of our Mom's will be receiving them today. (And I don't think my Mom will look here before I see her!) I didn't get to go see my Mom on Mother's Day because I was in too much pain with my back. And Chip had to work, so we knew we wouldn't get to see his either, so we are seeing them both today...finally!

First up, I made these little magnet frames. They are little wooden frames I picked up at Michaels. I painted the edges and then adhered patterned paper. I added a little ribbon and a flower to the one for my MIL, and just some ribbon to my Mom's - I didn't think it needed anything else with that pattern. My mom's kitchen is in an Italian theme, so I thought that paper would be perfect. And I printed the picture in black and white so it wouldn't clash with the paper. I added some magnet tape to the backs of these so they can go on the refrigerator. I actually like these so much that I plan to make one for myself.


I picked up wooden tissue box holders at Michaels too. I covered two sides with patterned paper, and two sides with a solid color. I then attached a picture of the kids on one of the solid sides. I painted the tops to match. Then I sealed the whole thing with a spray sealer. I think these turned out pretty cute and will probably end up making one of these for myself too!

I also made each of them a set of cards, but I will post them later.

Monday, May 07, 2007

More Cards for May

I finished up some more cards for the busy month of May. With the completion of these, I only have one more that I HAVE to get done, and I guess I really should make one for my son who turns 13 this month, and one for our anniversary. I also did three more in addition to these, but I can't post them yet, as they are for a contest at Paper Petal Memories that will be posted tomorrow. Once it is over, I'll post them here. And one of the gals at PPM is a nurse in a Pediatric Trauma Center and a bunch of us are making cards to send to her that they will be able to give to the parent's who have lost children, and for families who spend an extended amount of time with them do to the severity of their child's injuries. And even some for the kids who are there for a long time. I'd really like to try to get as many as I can done for that. So, I hopefully I'll actually end up with quite a few more cards made this month. Now, for the ones I've done:

I didn't have the stamp I really wanted to do this wedding card with, and though I'm trying to see if I can borrow it from someone, I went ahead and made this just in case. The wedding colors are black, white and lavender, so I wanted to use those colors for the card. The words are silver embossed. I think everything else is pretty straightforward on this card.

I made this anniversary card for my hubby's cousin. They are the parents of the cousin I made the wedding card for. The paper is from the Flavia collection by Colorbok. For some reason, I've been finding these papers a bit difficult to work with, maybe because they aren't the colors/style I typically work with. But I was determined to do something with them, and I think I'm quite happy with the way this turned out. I sanded the edges of the paper, and of the square accent paper. The stamps are the Studio G acrylic $1 stamps from Michael's. Ribbons are from Michael's and I believe the metal plaque is by Making Memories.

This is a very simple card, but I really like the way it turned out. I used a sketch from our sketch challenges at Paper Petal Memories. (And I still need to post my card there!!) This was a quick one to make. Again, used the Studio G stamp for the sentiment.

I think this one turned out so cute! This is for one of my little cousins who is having a birthday. I got the idea here, and she even had a link for printing out the maze. Mine is a little different, but the idea was definitely hers! This used more of the Studio G stamps, and the frog is from Stampin Up's Very Punny set. I really like the monochromatic look here.

And last for today is one more birthday card. I actually didn't do this one from scratch. I already had the card made, but it was all on the blue, and I wasn't happy with it because it was a little flimsy. So I cut off the front and trimmed it and adhered it to a white (sturdier) base. And I added the brads because I felt it just needed a little something else.

Thursday, May 03, 2007

A Few Cards

May is a big card month. Lots of birthdays, Mother's Day, and this year a wedding as well. On top of all that, it's our anniversary. So May has lots going on. I have 3 of the many cards I need for this month made. But I have quite a few to go, so I'll be busy!

The first is for my Grandad's birthday. I used a sketch that was posted at Paper Petal Memories this week. I used the Studio G clear stamps from Michael's. After coloring them in, I used Sparkle Glaze to add some dimension and sparkle. The images are raised with foam tape.

This one is for my Mother-in-law's birthday. For this one I used a sketch from Split Coast Stampers. I browse their gallery frequently, and get lots of ideas, but this is the first time I've even looked at their sketches, and I really liked this one. The image stamp is from the Dollar Tree (Miss Elizabeth's) and I added some little jewels to the centers of the flowers. The Birthday stamp is from Stampin Up.

And this last one is a Mother's Day card for my Mother-in-law. I won't be posting My Mom's until after Mother's Day, because she might read this! I used the Looks Like Spring set from Stampin Up for the background and the flower. The smaller stamp is a Studio G, and I printed the words from my computer.

Now to get busy making more cards!

Tuesday, May 01, 2007

Paper Bag Album

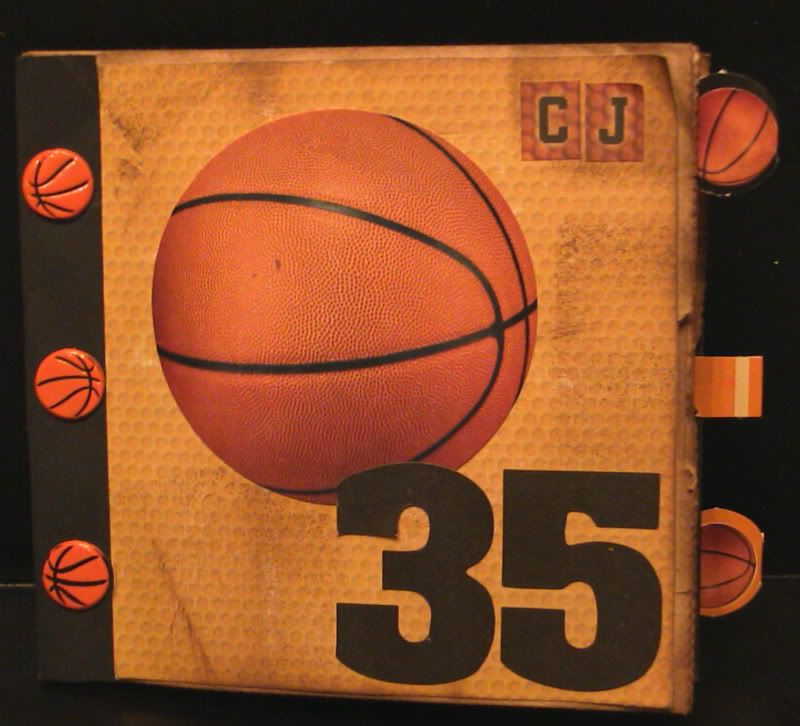
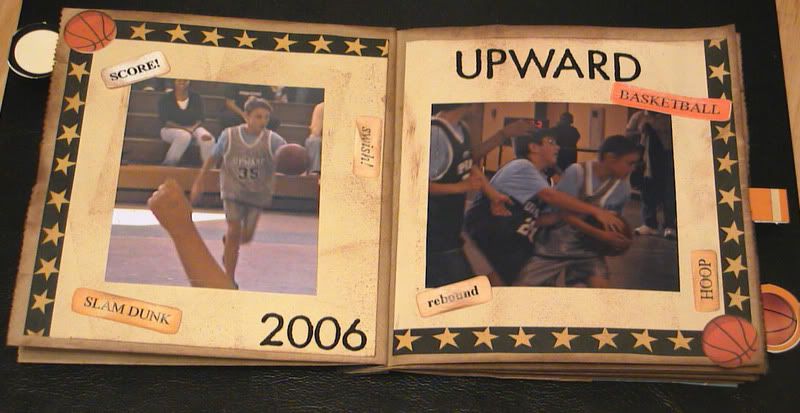
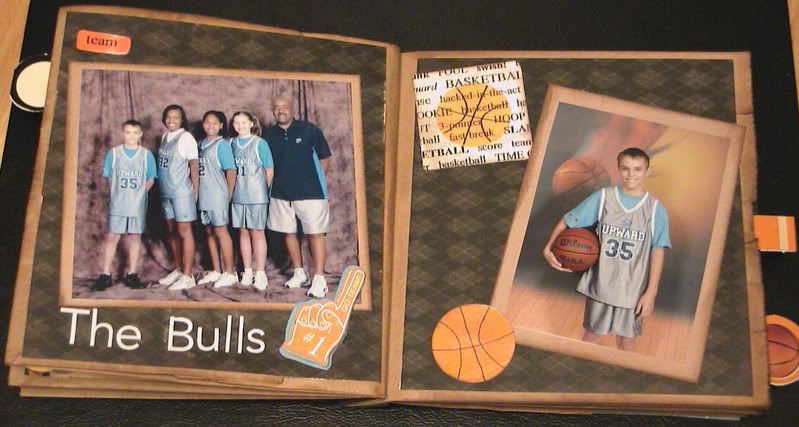
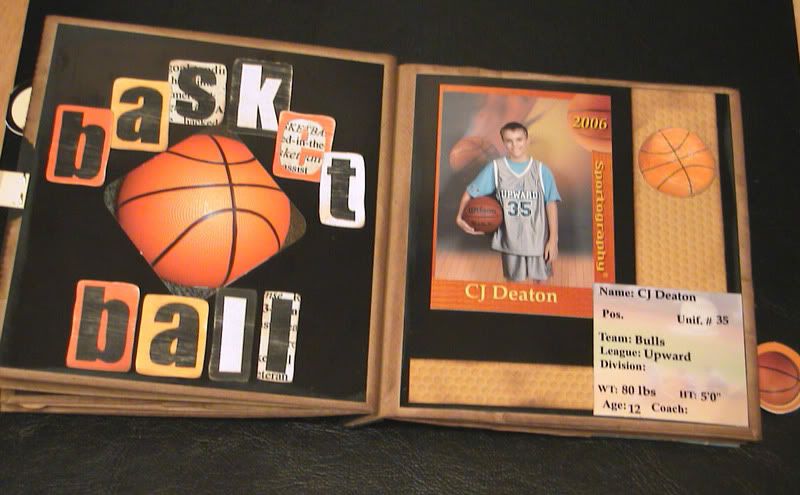
I made this cute little album out of lunch bags. I really like the way it turned out. I need to find a couple more pictures to go on the inserts, and I plan to journal on at least one of them too. I used a variety of products on it.

This is the front cover.

Pages 1 & 2


Pages 3 & 4 - the team picture and his individual shot. He ended up being the only boy on the team, and all the girls are taller than him! The upper grades didn't have that many kids playing, so the teams are small.

Pages 5 & 6 - I know this picture is the same as the previous page, but this was one of the trading cards, and I wanted to include it. I wanted to be able to see the front and the back, so I cut the stats from the back of one to include it.

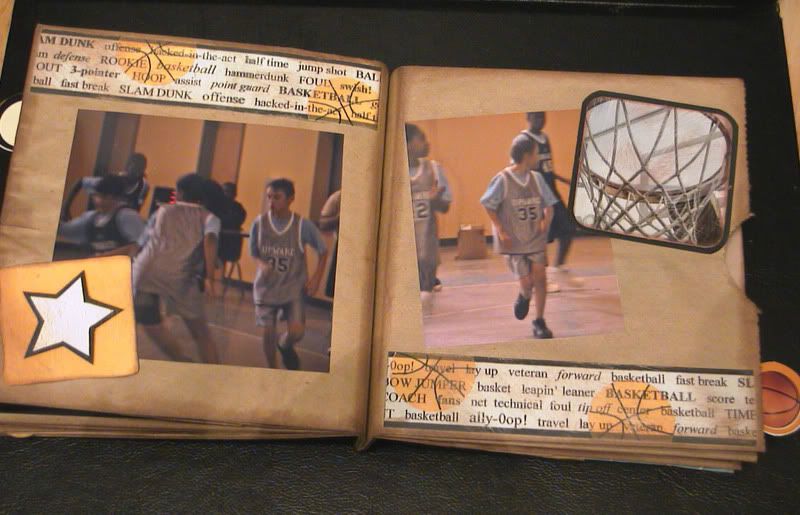
Pages 7 & 8 - just some action shots.

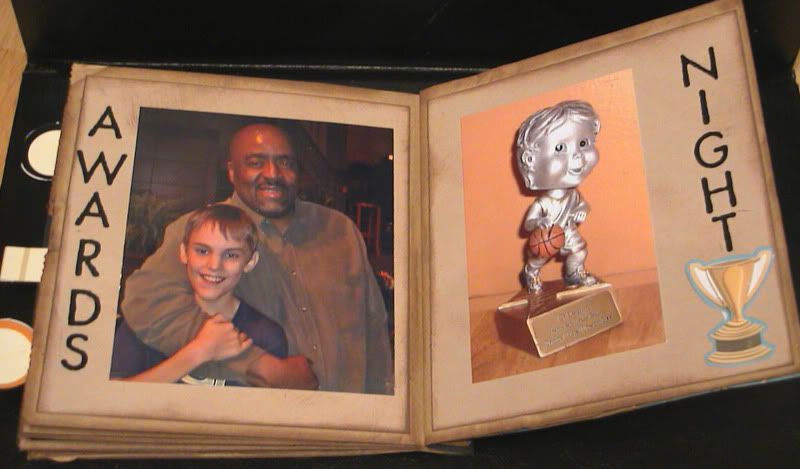
Pages 9 & 10 - these pictures were taken on awards night. Unfortunately, the kids walked across the stage so quickly, I could not get a good shot. So here he is with his coach. And then the trophy he got.

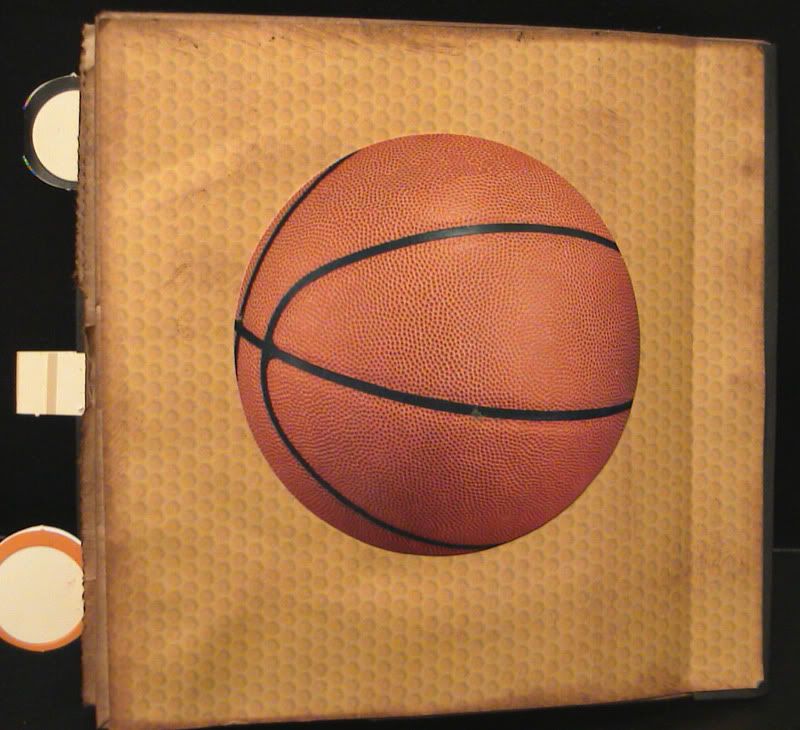
The back cover.

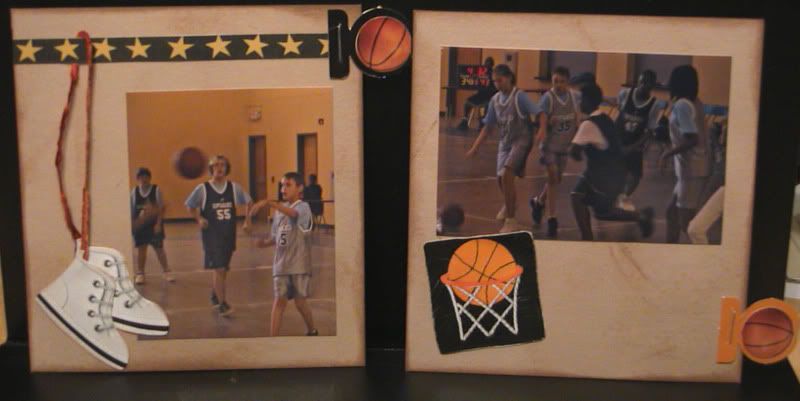
A couple of the inserts. These slide into the places where the bag is open (the 'tops' of the bags). I plan to journal on at least one of the backs.

And this is the other insert. I really need to look for one more picture for this page!

CJ's been sitting here looking the actual book while I am posting, and he seems to like it a lot. He keeps saying, "Cool!" This is why I do this! It makes me so proud when my family looks at what I make and they actually like and appreciate it!!!

My Sweet Valentines

Yes, I realize it's Officially May, and Valentine's Day was in February, but I think the fact that I have already scrapped these pictures is a big accomplishment. Especially considering I have hundreds from before February that are patiently waiting to be scrapped.
I had a little time on Saturday and decided I needed to play. So these are the pictures I worked with. I made a 2 of these 8x8 layouts for the kids' books. (They are exactly the same, so I'm just showing one) My favorite picture is the enlarged one, and the smaller pictures are all the "outtakes" of my little photo shoot.

I then created a 2-page 12x12 layout for my book. On this page, I stamped the title with my foam stamps from Paper Studio. It's a little uneven (I never can line these things up right), but I don't mind. I created the saying in the heart using parts of various stamps and my handwriting.

And here is the companion page. I kept these layouts pretty simple, as I wanted the focus to be on the pictures.

Wednesday, April 25, 2007

Frames

I just love making these frames. I've shown the one I made for Baby Hannah. Thought I'd share a couple more. The first one is one I made for Ruthi. It hangs in the hall, just outside her room.


This is one I made for another friend of mine for her baby boy.


I wish I had taken another picture of this one. The colors seem off - the flash washed it out a bit, and I think the blue paper behind it is throwing it off a bit too.

These are wooden frames purchased at Michael's. I painted the edges with acrylic paints, and adhered the paper to the front with spray adhesive. I sanded the paper around the edges to remove the excess. The letters are also from Michael's. I painted them and then used the a pencil eraser to paint the dots. The little wooden accents came from Michael's as well, and I hand painted them. The train was a bit of a challenge for me, because I'm not an artistic painter. I snapped a picture with my cell phone of the example in the store, and used it as a guide.
I stamped the letters in the name with foam stamps and the same acrylic paints. Added some ribbon, and the little jewels for Ruthi's, and done!
These are so much fun, and very inexpensive to make, as the frames are only $1, I think the letters were $1, and the little wooden flower and train are each 25 cents. They can be hung, but also come with a little dowel that goes in the back so they can sit on a shelf or dresser.

I originally saw the idea for these online somewhere, but can't for the life of me remember where!

Tuesday, April 24, 2007

Tag Books

Last summer I had the opportunity to meet some of the wonderful ladies from Paper Petal Memories at a little weekend retreat. We each brought a project for everyone to do. Karen had these adorable tag books and we could choose a boy or girl theme. She had everything cut out and ready for us - what an awesome project! I chose the girl one and completed it while we were there. As soon as I got home, I added the pictures. Since there were a few extras, she was kind enough to let me have a boy kit too. So almost a year later, I finally pulled it out and completed it too. I chose to use pictures of CJ from when he was younger to kind of go along with the one I made for Ruthi.

This is the front of the one for Ruthi.


And this the back.


Front of CJ's.


And the back!

Sunday, April 22, 2007

Silly

I used a sketch for this layout. At Paper Petal Memories, we have weekly sketch challenges. I'd like to say I do them all, but I don't. But I do them when I can. When I saw this one, I knew exactly which picture I wanted to use and what title I wanted as well. I took this picture of the kids during a "Christmas photo shoot" as I was trying to get pictures for Christmas cards and gifts for the grandparents. I love how they are both making the same silly face. I don't often do a 12x12 layout with only one picture, but I thought this one was a keeper and deserved its own page.

This is the sketch used for the layout. It originally came from ScrapRoom Blueprints.

The papers are by Provo Craft, flowers by Heidi Swapp, button by Favorite Findings. The ribbon is from Really Reasonable Ribbon. The chipboard letters are from TLC and Cloud 9, and are covered with patterned paper.

Birthday Wishes

Hopefully by Monday I'll get pictures taken and uploaded of my latest projects. Until then, I thought I'd share a couple more things I've done recently.
This is a birthday card I made. I tried the 'kissing' technique, but I need more practice with it. You can kind of see the pattern in the flower, but I need to work on it to get it to show up more. This was the first time I tried it, and though it's ok, I will keep practicing. It might help if I had some more patterned stamps, I don't really think I have the *perfect* one to make the technique work.
The stamps are from Stampin Up. The ribbon is from Michael's, and the little jewel in the center is from the craft dept. at Wal-Mart.

Thursday, April 19, 2007

Easter Bunny


Thought I'd share this cute LO I did of Ruthi on her first Easter. I did it a while back, and it is really simple, but I just think it is so cute. The cute paper-pieced bunny was made by Pam - an online friend of mine. I literally put this together in just a few minutes since the bunny was already made. I added letter sticker letters and some fibers to the little tag, and voila! Easy peasy!

The Wedding Cake

I'm finally getting around to posting the picture of the wedding cake I made for my friend Penny. She got married the day before Easter. I wasn't feeling well, with all the allergy crud, but I pulled it off and was pretty happy with it. The florist made the floral arrangement for the top - I don't do flowers! All I had to do was set them on top.

Saturday, April 14, 2007

Baby Cards

OK, so I think I'm FINALLY recovered from exhaustion and not feeling well, and beginning to feel somewhat normal again. (Long couple of weeks for me!) I'm actually trying to work on some things again. But until I've created something new, I'll post some more stuff I've already done.

Here are a couple baby cards I made. I made these for a swap at Paper Petal Memories. Funny thing was, I TOTALLY forgot I had joined this particular swap - STILL don't know how I did that! I received a message from the hostess asking if I had mailed mine (they were due the next day) and I was so embarrassed! So that night I got busy - I had to make 5 of each one. I was very glad I had not joined any other groups! I got them done and in the mail the next day - priority of course, and they ended up only being a couple days late. *Phew!* For having to decide on a card and then create it - multiple times - at a very quick pace - I was very pleased with the way they came out. I just went for the same design in both pink and blue to save time.
The footprint stamps are Inkadinkado, and I stamped them with acrylic paint. The 'sweet baby' stamp is from the $1 bin and Michael's. The little square that is stamped on is raised. The ribbons probably came from Michael's, that is a Prima flower, with a brad, and the little onsie brad on the blue card is from Eyelet Outlet.

Monday, April 02, 2007

Lingerie Shower Goodies

I posted the invitations I made for my girlfriend's lingerie shower earlier this month, and finally had the shower this weekend. Now that it's over, I can post the things I made for her.
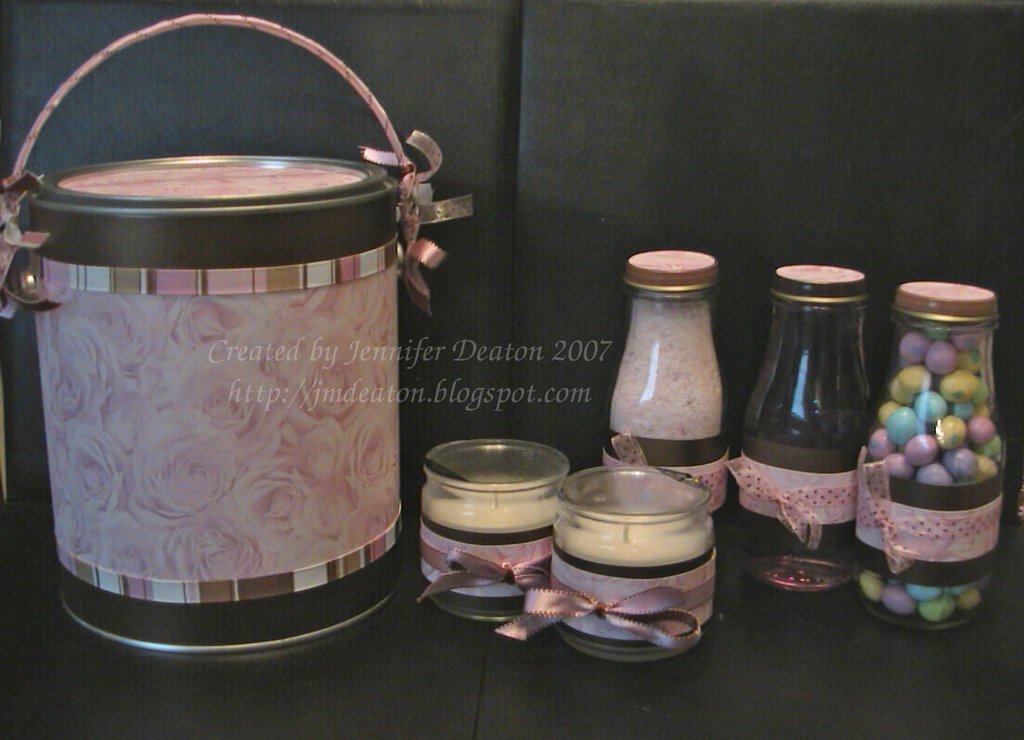
I made a 'honeymoon' paint can filled with goodies for them to take with them. I included 3 frappucino bottles - one with homemade bath salts, one with bath gel and the third with peanut M&M's (her favorite), and two candles, all with the same papers/ribbons I used on the can. I also included some other non-altered things in the can.
I loved the rose patterned paper - not sure who makes it. The solid paper is from The Paper Company and is actually Metallic Jewel Bronze and is much prettier in person. It looks quite bland in the picture. All the ribbons are from Michael's.


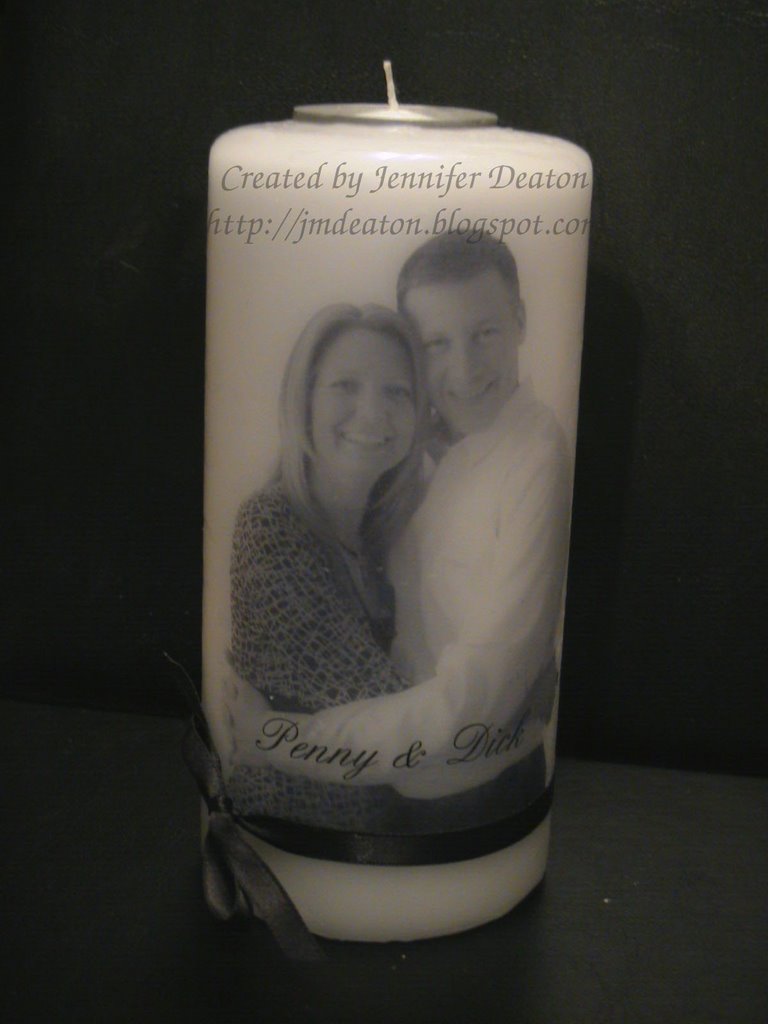
I also made this candle for them. I found a great tutorial on Splitcoast Stampers and couldn't believe how easy this was! I messed up the first time, but quickly learned how to get it just right so I started on a new candle. I really love the way it turned out. I cut out a place in the top to insert a tealight so they can actually use the candle, and just replace the tealight. That idea came from Splitcoast as well.

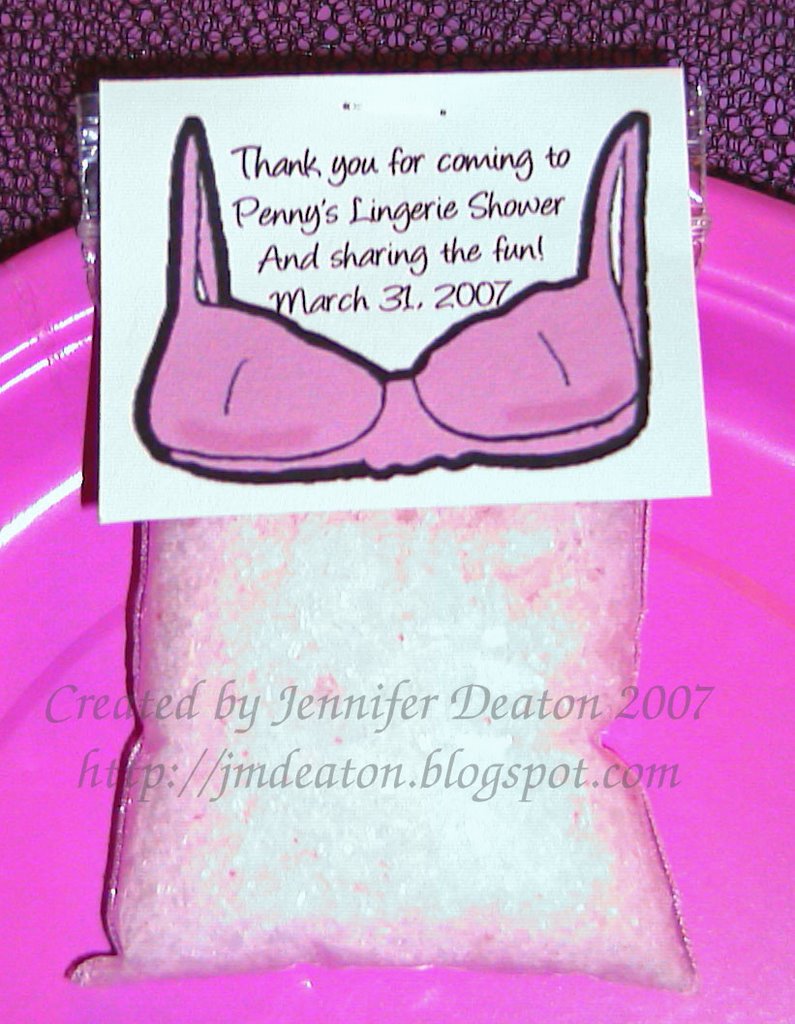
I made these cute little favors for the guest. It is a bag of homemade bath salts. I made the topper using MSWord and just stapled them to the bags.


And this is the cake. It was very yummy if I do say so myself. It was chocolate with cream cheese and raspberry filling. The idea for decorating it came from Family Circle magazine - Sept. 1998 issue. I had this put aside knowing one day I wanted to make it. The chocolate wraps were a bit of a pain to make, and didn't turn out completely perfect, but it worked. I don't think I'll ever do it again due to the fits it gave me! But everyone liked it, and it did taste good!