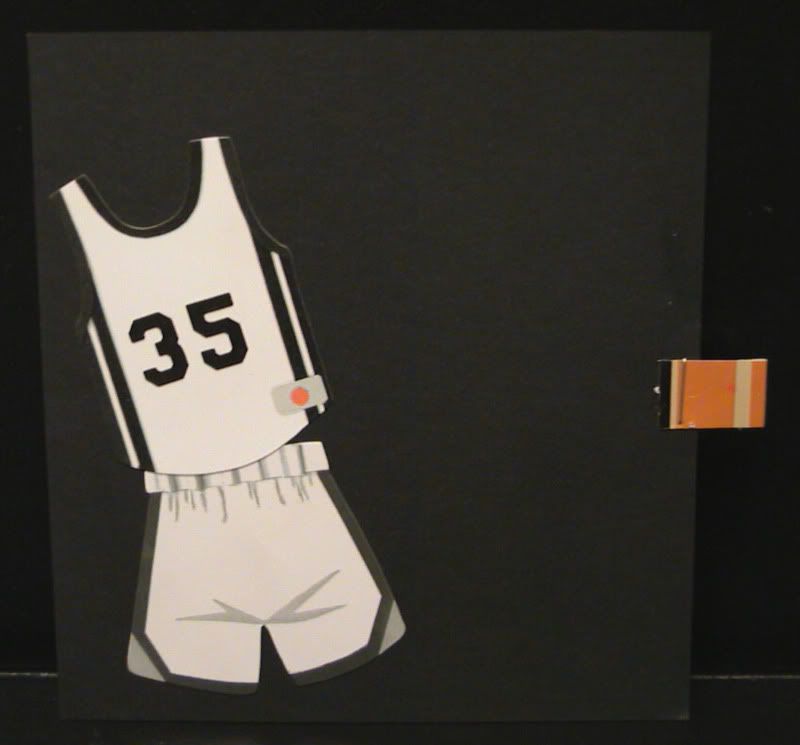
Showing posts with label Kids. Show all posts

Wednesday, April 08, 2009

Dino-riffic!

Here's a card I made using a cute little dinosaur stamp I got from Oriental Trading.
It's just a simple card - that's been my thing lately - keeping it simple!

I stamped the image first on white cardstock, then again on the patterned paper. I cut the body of the dino out of the paper and adhered it to the cardstock image. Then I just colored in the spikes.
The word stamp is Studio G (I think!)

Simple...but cute...at least I think so!

Sunday, April 05, 2009

Let's Try This Again!

Oh My Word!

Has it REALLY been almost a year since I posted something here? I don't know what happened with me! It's been slow - I haven't made tons of stuff, but I still can't believe I haven't posted in so long!

So...I decided to give my blog a little mini-makeover and a fresh start. I found this cute header at The Cutest Blog on the Block and altered it to add my blog name. I don't dislike butterflies, but it probably wouldn't have been my first choice, however, I liked the colors and everything else about it, so it works!

I won't make any promises that I'll be good about blogging regularly. I can't even seem to blog regularly on my main blog anymore! I think one of my problems is I discovered Facebook a while back, and I tend to spend a LOT of time on there!

But I'm at least going to TRY to get back to blogging more!

I'll start by posting a card I made for my daughter for her 4th birthday. One of her favorite shows is "Yo Gabba Gabba" and her favorite character is Foofa. So she wanted a Foofa cake for her birthday.

Since I was planning to do that, I had to make a Foofa card as well! I found an image online and used it as a pattern to make the card as well as the image on the cake.

Here's the card:


And of course, the cake! Ruthi wanted a cookie cake, so this is what I did:

And you know, I didn't notice until just now, as I posted this, that I forgot to add the eyelashes on the cake! I was in such a hurry that day, finishing the cake just before the party. I can't believe I didn't even notice it! I don't think it looked that odd until I looked at the card and cake pictures at the same time! Oh well...Ruthi certainly didn't care!

Sunday, May 18, 2008

A Couple of Layouts

I still have more auction things to post, but I thought I'd break away and post a couple of recent layouts.

Both of these were inspired by sketches at PageMaps.com. I love the sketches there!

This was the first sketch I used (this one is from May sketches):


And here is my layout - "Sweet & Sour"

Sorry about the shadow - I guess I was between the light and the layout!

Here's a close up of the journaling:


Here is the second sketch (From February sketches)


I flipped the sketch for my layout. I also added a pull-out tag behind the picture for the journaling.

The plain cardstock behind the title looks almost white, but it is actually grey.
I didn't take a pic of the journaling. But it basically explains the title. I call my hubby, "My Love". When I was trying to come up with a title for this page, it was he who suggested, "My {little} Love" since CJ is a "mini-Chip". And he is my little love, so it's perfect. Though, he's not so little anymore - he's only 1/2 inch shorter than me!!! This picture was actually taken in December 2005.

For this one, I used some chipboard letters from Cloud 9. I inked the tops with black. They were originally a beige color. I only inked the tops though, I left the edges the natural color. You can't really tell in the pic, but it makes them have even more of a dimensional look. For the brackets, I actually used a chipboard piece as the stencil, traced it and colored it in. I stamped the word 'little' on red cardstock. I can't remember the name of the stamp set, but each letter is a different font. The 'e' is a negative image, but is a little hard to see in the photo. You can click it to make it larger if you want to see it better. The heart if by Heidi Swapp, I believe. And the little circle with the date on it is a chipboard circle. I covered it with the red cardstock and punched a hole with my Crop-a-dile.

Wednesday, January 23, 2008

Christmas Hug

I know I've been sporadic with my blogging. I have aspirations to be a daily blogger, but that's probably never going to happen. I'm ok with that. I hope you are too!

Anyway, here's another layout I did. This one is super simple. The challenge (at PPM) was to use a large photo, covering at least 2/3 of your layout.

This is one of my favorite pictures I took at Christmas. I printed it in 8x10 - that took up plenty of space for the challenge.

And I just wanted to keep the rest simple so the picture would be the focus. Yes, that is our little tree in the background. We opted to just put up a small one again this year for several reasons. But I'm looking forward to having a real tree again next Christmas. I miss the smell!


It's hard to tell, but the punched flowers at the bottom were punched from the same patterned paper. Simple, but I like it

Saturday, January 19, 2008

Baby Love

OK Christy - I'm back! You crack me up!!

And for the rest of you - so you won't be in the dark, Christy wrote:

Okay, it is officially now OVER a week since you blogged on here. Get busy girl!
You sick?
Your kiddos sick?
Too involved in all the politics on TV?
Wondering if John will be released from Stefano's hold? (I don't watch, but saw the commercial)
Worried about the writers strike?

No, I'm not sick, but I have had a sick kiddo. Definitely not too involved in the politics. A little behind on Day's so not too worried about John at the moment. And although I'm annoyed at the writer's strike, that's not what has kept me away either. Nope, I've been at my parent's house, and though I intended to blog from there, it just didn't happen. If you really want the details, you can read them here.

I think I have finally shared all my Christmas stuff and I honestly haven't done much this year yet. I'm hoping to change that soon though. I have gotten a couple layouts done, however. I'm trying to keep up with the challenges at Paper Petal Memories - the message board I'm a part of. It is a much smaller board - nothing like Split Coast Stampers. But I think that's why I love it. We are kind of a close-knit group of gals and have formed some wonderful friendships. I even got to meet up with 3 of the girls a couple summer's ago for a weekend of scrapping. Well, we didn't actually accomplish that much scrapping. But we did lots of shopping, eating, laughing and having a good time. And one of the other ladies on the board, I have formed a wonderful friendship with. We talk on the phone pretty regularly, and even though we haven't met "face to face" she has become a great friend. It's amazing that you can form friendships like this. Anyway, we have some challenges going on over there, and I'm trying keep up and do them this year in an effort to get more scrapbook pages done.

The layout I'm posting today was a sketch challenge. The sketch came from Page Maps. I LOVE the sketches from there!

So the sketch was my starting point. Then I chose the pictures. Then I chose the colors and went from there. And I used my brand new toy I got for Christmas to make the title. My parents got me the Cricut Expression - what an awesome surprise! And I'm having fun figuring out how to work it!

Anyway, here's the layout:


It's funny, I actually had a completely different picture in my head of the outcome of this layout. But it changed as I went. But I'm happy with the end result.

I'll be back to share the other 2, plus hopefully more that I'll be getting done.

Saturday, November 03, 2007

A Little Something Different

OK, so up till now, most of the things I have created have been paper-related for the most part.

But I decided to try something new.

I wanted to make a blanket for my daughter.

I don't sew.

Well, not much anyway. I will occasionally sew a button or stitch something up that has come unstitched. But I don't really enjoy it.

Once upon a time I could use a sewing machine and do a pretty good job. I made a really pretty skirt and a petticoat to go under it. That was ages ago. But I did learn how to use a machine.

A couple years ago, I purchased (for almost nothing) an almost new sewing machine from a friend of mine who was having a yard sale.

It has been sitting in the closet since then.

I did get it out a couple months ago and tried to use it to do some sewing on some cards and layouts. But I couldn't get the darn thing to work right.

And the other day my neighbor (who sews a lot) looked at it and fiddled with it, and thought it was working ok. But alas, it's not.

So how does one make a blanket without sewing? Well, I'm sure you've seen these, but when I found this tutorial on Barb's blog, I just knew I had to try it!

I goofed up just a bit. I decided I wanted mine rectangle instead of square like Barb's. So I figured out my measurements. I did great on the length, but with the width, well...I figured out who wide I wanted it but forgot to include the measurement for the fringe. So I cut it to narrow.

That's why I wanted my machine to work. I was just going to stitch the long sides and have fringe only on the ends. But I couldn't get it to work properly.

So I just made the fringe on the sides a little shorter than on the ends.

It is more narrow than I really wanted, but in the end it all worked out fine. It fits Ruthi and her bed perfectly. So I'm happy.

When I saw this Pink Georgia Tech Fleece, I could NOT pass it up. Ruthi always cheers for the Jackets when her daddy is watching football. (Even if they are not playing) And she makes a really cute cheerleader!

Here's the blanket:


And if you will notice, there is a little pillow there too. I used a little princess pillow that Ruthi has had since birth, but was falling apart. I just cut the fleece to the right size and put the old pillow in between and tied around the sides. I didn't have a piece of the GT fleece leftover that was large enough to fit and be centered, so I used the solid pink (which is also on the back side of the blanket). Then I hand stitched that GT square on. (See, I am at least capable of sewing!) It didn't go on perfectly straight, but I will not let my OCD get he best of me!

Oh, and since I goofed an my strips were shorter on the sides, I couldn't loop them - I had to the pieces together into knots. But I'm happy with it.

And here's a picture of my little darling with her new blanket.


I'm pretty sure she likes it. She says, "Mommy, it's so pretty and sosht." (soft) Makes me smile!

Saturday, August 11, 2007

I Really Will Be Back Soon!

I know I haven't posted here much lately - but I have a good reason. I am diligently working on my website for my business. It is taking a LOT of time, because I'm very slow at this sort of thing. I'm no expert web designer or anywhere close, so it is slow going. I am making progress and it will be ready to launch soon. However, I've not had much time to create anything with paper. But I'll be back to that shortly and posting.
I did get one 8x8 LO done last week for a sketch challenge at Paper Petal Memories. Seeing how for now, I'm hosting the challenges, I figured I'd better produce a LO too! It is very simple, but one more done!!!


This little pink bear was my daughter's favorite - until we lost it. So just a quick little LO remembering the delight that bear brought her!

Misc. papers, Creative Elements flower, Spare Parts letters and Misc. letter beads.
The sketch I used was from April '07 by Becky Fleck

Saturday, June 09, 2007

Cousins

I did a LO today! I haven't had a chance to create anything all week, even though I hoped to. It was just one of "those" weeks, and I had other things going on and honestly just wasn't in the mood to create. But that all changed today.

I was in a 5-supply kit swap at PPM in which we each sent to another 'player' the following:

1 sheet solid cardstock
2 sheets double sided pp
1 lettering ( either rub-ons, stickers, etc)
1 type of embellishment ( a yard of ribbon, buttons,stickers,etc)
The challenge, when we received our kit, was to create a LO using ONLY those supplies.
This was a bit of a challenge for me. It was very tempting to just add something else from my stash....but I played by the rules.

This is what I received:

I Loved these papers! I believe they are by Wild Asparagus. (I know the letters are.)

I wasn't feeling quite as creative as I had hoped, so the first thing I did was find a sketch that I'd like to work with for inspiration. I chose one from here. It is the last sketch - the one that has an example LO following it.

Then I started looking through pictures to decide what to use. I chose pictures from last weekend of my kids with their cousin. I planned to print them in black and white because I figured I'd never find pictures to compliment the colors in the papers. But I forgot to switch them before printing, and to my surprise, the colors in the photos actually went well with the papers!
So, this is what I came up with:

And I have to say, I was quite happy with it until I wrote the info in on the bottom. My white Signo pen didn't seem to like the textured paper, and I'm really wishing I had just used a black pen. It just doesn't look right to me, but oh well...not much I can do about it now! And it just shows that I'm human and make mistakes!

There are a lot of buttons, but that's the only embellishment I could use, so I used them! I really wanted to cheat and add a flower until I remembered recently seeing others making flowers out of paper, so I used the patterned papers to do just that. (Since the paper was double sided, I actually had 4 patterns to work with, but only used 3.) Oh, and this picture doesn't do justice to the colors in these papers - they are so pretty in person!

This was a little 'out of the box' for me, but I had a lot of fun! And at least I got something done this week!

Tuesday, May 01, 2007

Paper Bag Album

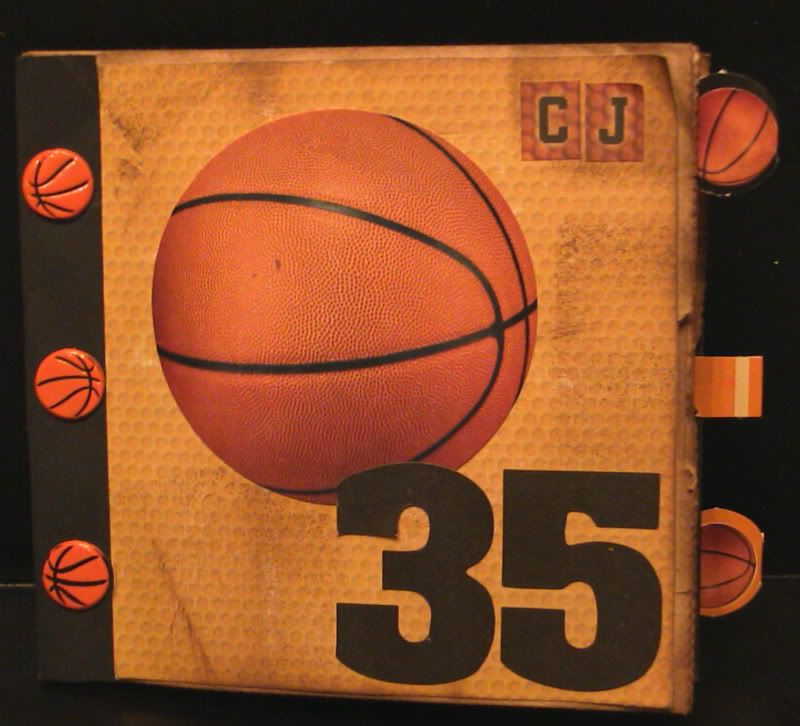
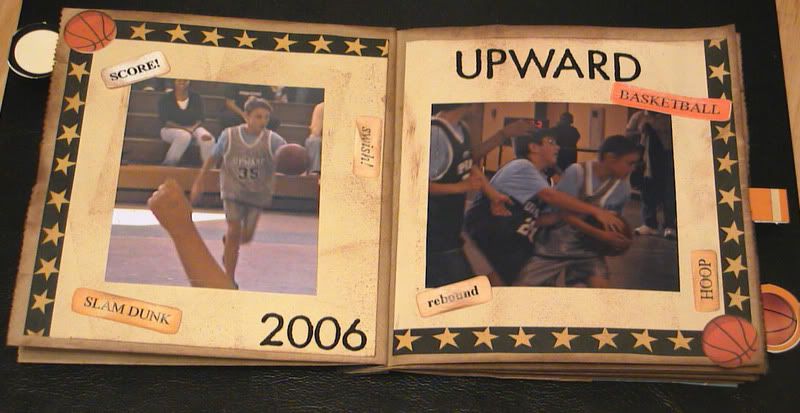
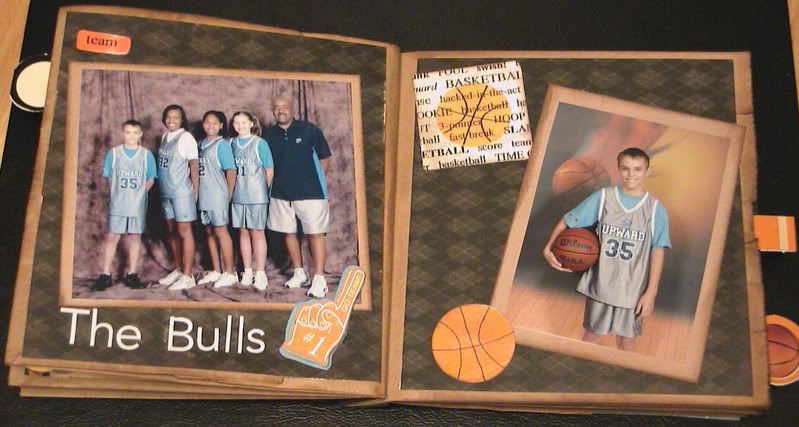
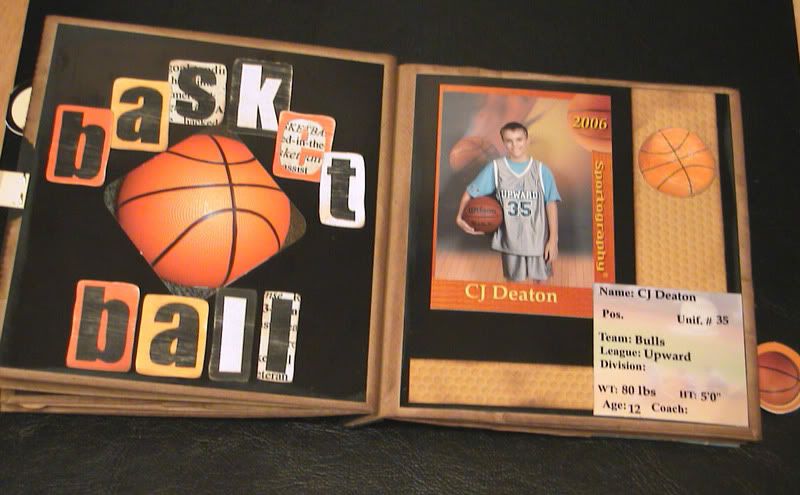
I made this cute little album out of lunch bags. I really like the way it turned out. I need to find a couple more pictures to go on the inserts, and I plan to journal on at least one of them too. I used a variety of products on it.

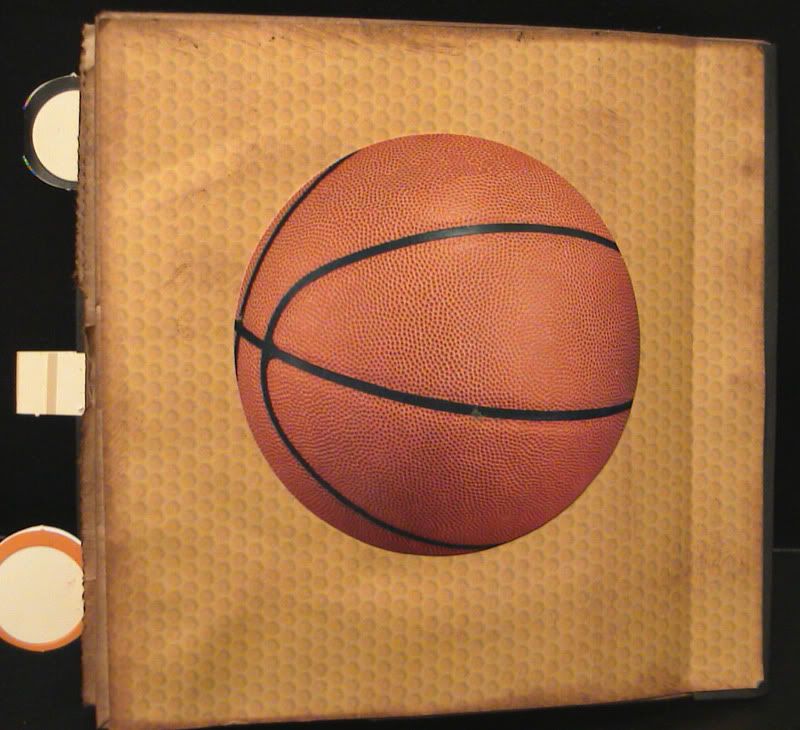
This is the front cover.

Pages 1 & 2


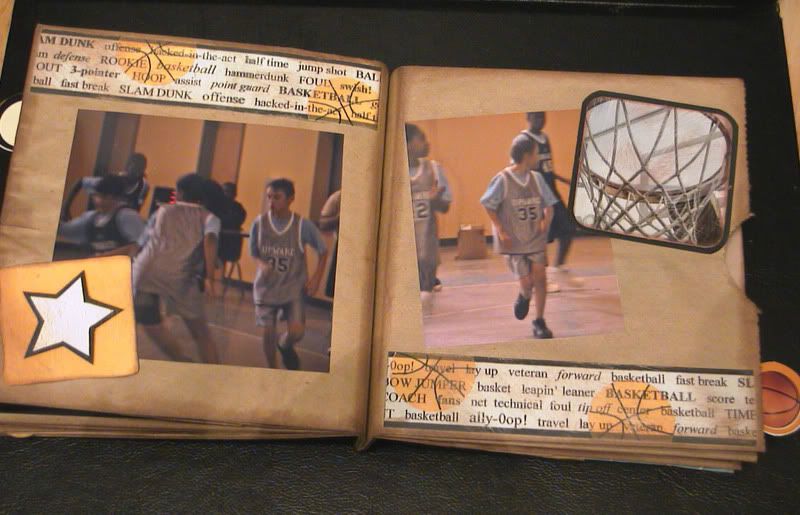
Pages 3 & 4 - the team picture and his individual shot. He ended up being the only boy on the team, and all the girls are taller than him! The upper grades didn't have that many kids playing, so the teams are small.

Pages 5 & 6 - I know this picture is the same as the previous page, but this was one of the trading cards, and I wanted to include it. I wanted to be able to see the front and the back, so I cut the stats from the back of one to include it.

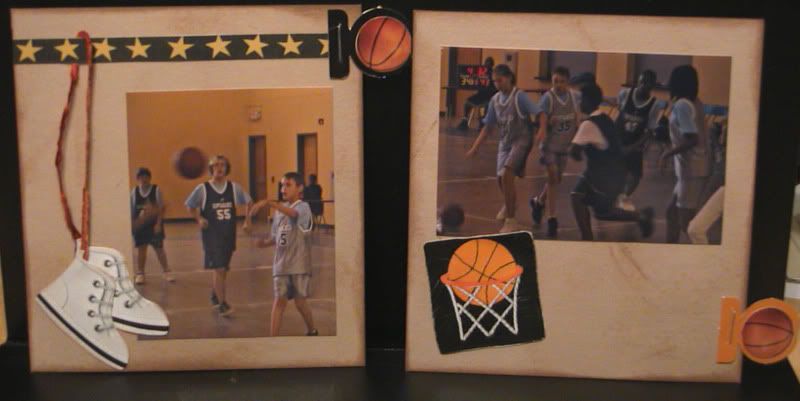
Pages 7 & 8 - just some action shots.

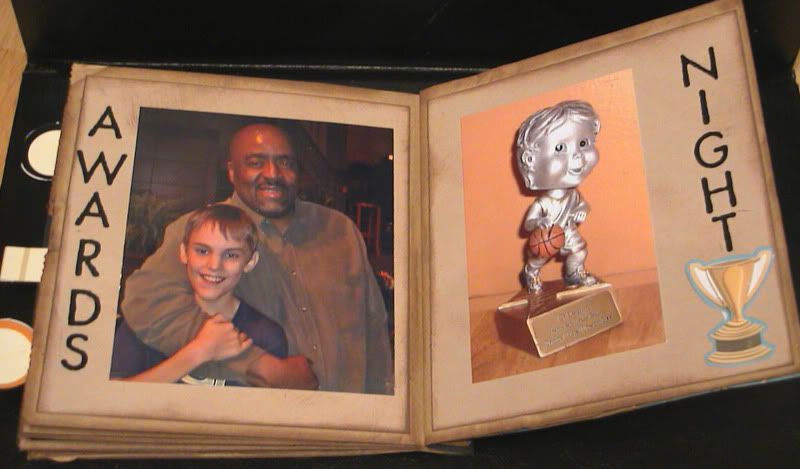
Pages 9 & 10 - these pictures were taken on awards night. Unfortunately, the kids walked across the stage so quickly, I could not get a good shot. So here he is with his coach. And then the trophy he got.

The back cover.

A couple of the inserts. These slide into the places where the bag is open (the 'tops' of the bags). I plan to journal on at least one of the backs.

And this is the other insert. I really need to look for one more picture for this page!

CJ's been sitting here looking the actual book while I am posting, and he seems to like it a lot. He keeps saying, "Cool!" This is why I do this! It makes me so proud when my family looks at what I make and they actually like and appreciate it!!!

My Sweet Valentines

Yes, I realize it's Officially May, and Valentine's Day was in February, but I think the fact that I have already scrapped these pictures is a big accomplishment. Especially considering I have hundreds from before February that are patiently waiting to be scrapped.
I had a little time on Saturday and decided I needed to play. So these are the pictures I worked with. I made a 2 of these 8x8 layouts for the kids' books. (They are exactly the same, so I'm just showing one) My favorite picture is the enlarged one, and the smaller pictures are all the "outtakes" of my little photo shoot.

I then created a 2-page 12x12 layout for my book. On this page, I stamped the title with my foam stamps from Paper Studio. It's a little uneven (I never can line these things up right), but I don't mind. I created the saying in the heart using parts of various stamps and my handwriting.

And here is the companion page. I kept these layouts pretty simple, as I wanted the focus to be on the pictures.

Tuesday, April 24, 2007

Tag Books

Last summer I had the opportunity to meet some of the wonderful ladies from Paper Petal Memories at a little weekend retreat. We each brought a project for everyone to do. Karen had these adorable tag books and we could choose a boy or girl theme. She had everything cut out and ready for us - what an awesome project! I chose the girl one and completed it while we were there. As soon as I got home, I added the pictures. Since there were a few extras, she was kind enough to let me have a boy kit too. So almost a year later, I finally pulled it out and completed it too. I chose to use pictures of CJ from when he was younger to kind of go along with the one I made for Ruthi.

This is the front of the one for Ruthi.


And this the back.


Front of CJ's.


And the back!

Sunday, April 22, 2007

Silly

I used a sketch for this layout. At Paper Petal Memories, we have weekly sketch challenges. I'd like to say I do them all, but I don't. But I do them when I can. When I saw this one, I knew exactly which picture I wanted to use and what title I wanted as well. I took this picture of the kids during a "Christmas photo shoot" as I was trying to get pictures for Christmas cards and gifts for the grandparents. I love how they are both making the same silly face. I don't often do a 12x12 layout with only one picture, but I thought this one was a keeper and deserved its own page.

This is the sketch used for the layout. It originally came from ScrapRoom Blueprints.

The papers are by Provo Craft, flowers by Heidi Swapp, button by Favorite Findings. The ribbon is from Really Reasonable Ribbon. The chipboard letters are from TLC and Cloud 9, and are covered with patterned paper.

Thursday, March 29, 2007

Fire Girl


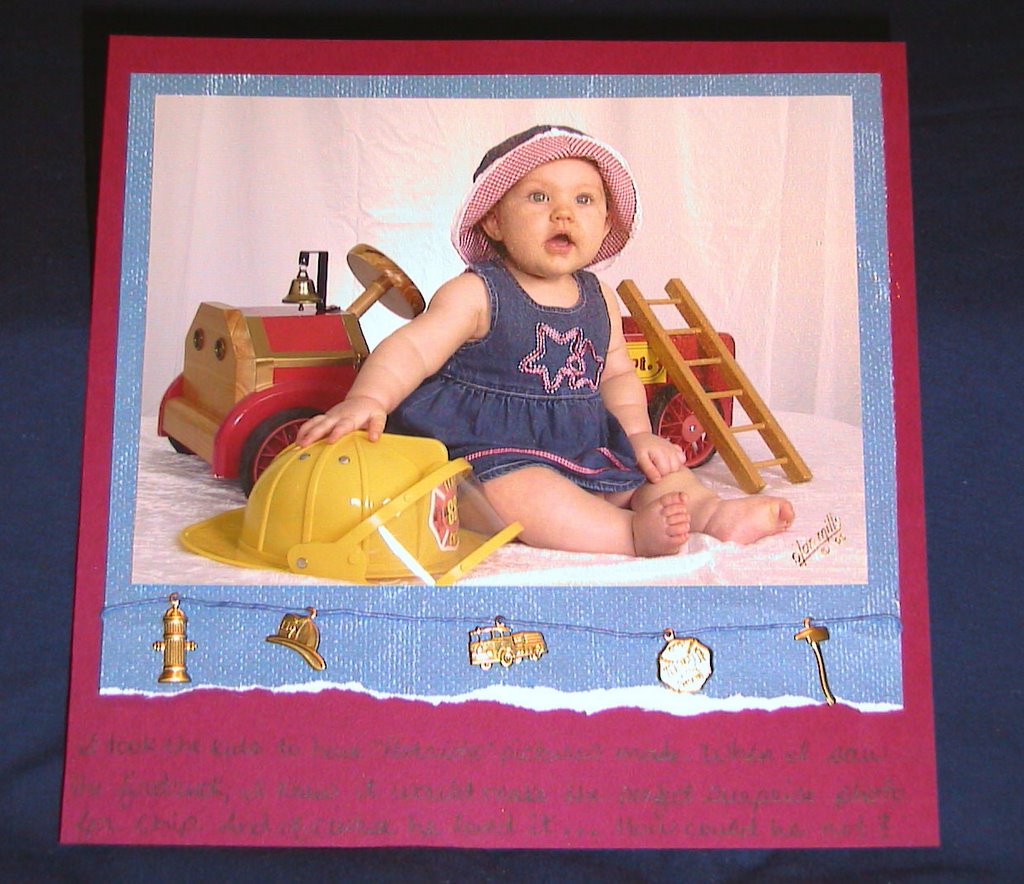
I just love this picture - is she a doll or what? (Not that I'm biased or anything!) I had taken CJ and Ruthi to have their pictures made (She was 6 months old here) and when I saw that little fire truck, I just knew I had to have her picture made with it just for her Daddy! This is an 8x8 lo, and I kept it simple because the photo really is the focus. I know you can't read the journaling on the bottom, but it basically says what I said here, and that the picture was a nice surprise for Chip.
The red is the background of the LO. Because I took a picture instead of scanning it, I couldn't get the black background cropped out evenly.