Thursday, March 29, 2007
Fire Girl
I just love this picture - is she a doll or what? (Not that I'm biased or anything!) I had taken CJ and Ruthi to have their pictures made (She was 6 months old here) and when I saw that little fire truck, I just knew I had to have her picture made with it just for her Daddy! This is an 8x8 lo, and I kept it simple because the photo really is the focus. I know you can't read the journaling on the bottom, but it basically says what I said here, and that the picture was a nice surprise for Chip.
The red is the background of the LO. Because I took a picture instead of scanning it, I couldn't get the black background cropped out evenly.
Wednesday, March 28, 2007
Expecting the Extraordinary
This is another layout I did a while back. It is one of my favorite pregnancy layouts. I love these pictures and was trying to express our love through the page. I was having a hard time coming up with a title and asked for Chip's help. He came up with the title. He did a good job, didn't he? The tag behind the picture contains hidden journaling.
Saturday, March 24, 2007
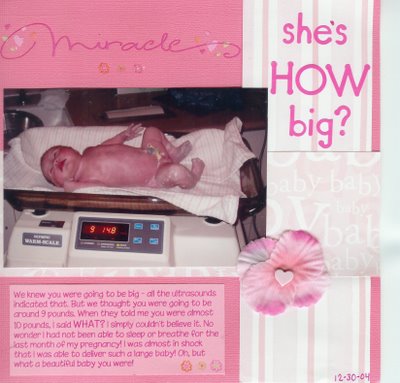
She's HOW Big?
First off, I got the idea for this layout (the design and title)from one I saw online somewhere. Unfortunately, this was done before I knew better about writing down my source to give credit. So, if this looks familiar, and you know where the idea came from, please let me know so I can give proper credit.
I still can't believe I was able to give birth to an almost 10 pound baby, especially after CJ was under 3 pounds! We knew Ruthi was going to be a big girl, but really expected her to be 9 pounds - TOPS! So when I saw the idea for this, I knew it was perfect for this picture.
This is an 8x8 layout.
All the papers are by Provo Craft
The letters are from a company that no longer exists.
The rubons at the top are by Deja Views
Not sure where the flower and brad came from.
The font I used for my journaling is Chinacat
Friday, March 23, 2007
Precious Baby Girl
Since I haven't had a lot of time lately to create, and what I am working on at the moment I can't post yet, I thought for the next few posts I'd share some of my past stuff.
This is a layout I did of my sweet little girl a while back. Can you tell I love pink? That wasn't always the case. I really didn't start having an affinity for pink until I knew I was having a little girl! Now I just LOVE pink!! And I think it's obvious in this layout.
This is a 12x12 layout, and I think it was the first time I used a large picture on a scrapbook page.
The quote is from DCWV and says:
A Daughter Is...
...a star glimmering
in the sky
a wonder, a sweetness
a perception, a
delight...
everything beautiful
A daughter is
love
The rubons are from Deja Views
Chipboard from Topline Creations (TLC), which I inked
The little page pebble is from EK Success
The eyelets are by Boxer Scrapbook Productions
The little flowers are by Offray (@ WalMart)
And the ribbon is from Really Reasonable Ribbon
Thursday, March 22, 2007
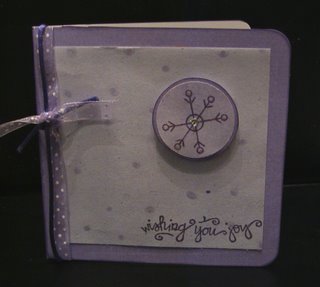
A Winter Card
I joined a month-of-the-year card swap at Paper Petal Memories. This meant there were 12 people in the swap, each picking one month of the year to center their card around. Each person makes 12 cards (one for each person in the swap) and after swapping them out, we end up with 12 different cards. My month was January. For some reason I was having a very difficult time getting inspired and really struggled with what to do. This is what I came up with, though I'm not sure how happy I am with it.
The only thing I knew for sure I wanted to do is use purples instead of the traditional blues for a winter card.
I decided to do square cards, which was my first time doing so. One thing I learned - if you are doing heat embossing, do so BEFORE you attach it to the background paper. I had the lighter patterned paper already attached to the background paper when I stamped my sentiment and embossed it. That resulted in a little bit of warping to the paper and it doesn't quite lie flat anymore.
Plus, this particular card (the one I kept for myself) got a little damaged and doesn't look quite as nice as it should!
The stamps I used were from the $1 bin at Michael's. The papers are by Provo Craft and the ribbon is from Michael's. I added a tiny jewel to the center of the snowflake and though you can't really see it, I added a bit of sparkle glaze to the circles at the tips of the snowflake. It is then raised from the rest of the card with foam tape.
Wednesday, March 21, 2007
Easter Peeps
OK, I've GOT to get better about posting more regularly on this blog. I've gotten a handle on my main one, but this one is still getting neglected. Thanks to all of you who have made such nice comments, it really does a girl good!
I'm actually going to busy working on some things for my friend who is getting married in less than 3 weeks, so I'll be busy until after then, but I'll try to get some more stuff on here. After the wedding, maybe I can get back to creating more regularly too!
This project is one I saw on Splitcoast Stampers and just fell in love with and had to try it. I seriously wanted to do these and try to sell them, but I really cut it too close to Easter. Next year I'll have to start much earlier (as soon as they start putting Easter candy out!) along with another idea I saw and try to sell them then.
The hardest part to this was getting those bunnies in there right! It didn't help that I had the wrong type of jar - I needed one with a wider neck. But I figured it out anyway. After searching information about the recipe I decided to follow some of the advice I read, but it didn't work as I had hoped. Some were saying that when you bake them that they come out too crumbly and adding a little more butter did the trick. So I went ahead and added the extra butter. What I ended up was a gooey (though very yummy) mess. They were far too gooey to cut into bars. So I'm including the recipe here with the original amount of butter. I plan to try them again soon and see if it makes a big difference.
In the jar: 1 sleeve of graham crackers, crushed
8 peeps
1/3 C. brown sugar (pressed into the center of the peeps)
1 1/2 cup Easter M&M's
Peep Bars
Empty contents of the jar into a bowl Snip the bunnies into bits with kitchen shears or cut up with a knife. Return the bunny bits to the mixture and mix well. Add 1/2 cup softened butter and 1 tsp. vanilla and mix well. Pat into a greased 8x8 baking dish. Bake at 350 for 15 minutes. Cool and cut into bars.
Option: leave the bunnies whole; combine remaining ingredients and place the bunnies on top. Bake as directed.
I also found this recipe:
Peep Ice Cream Topping
Same as above, but omit the vanilla.
Pat into a greased 9x13 baking dish. Bake at 350 just until peeps melt. Cool. Break up with a knife. Sprinkle over vanilla ice cream.
Monday, March 12, 2007
Recipe Cards
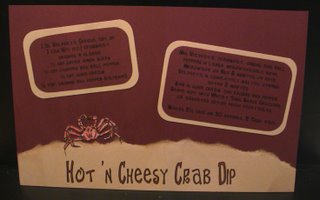
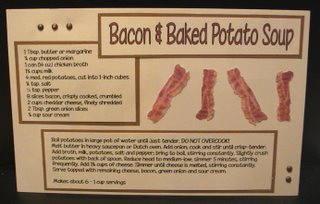
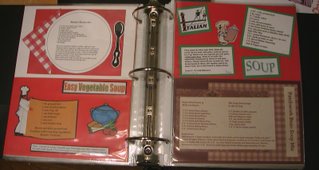
I am hosting a Recipe Swap at Paper Petal Memories. I had participated in one quite a while back, and decided I wanted to add to my book so I started up another one. I had 6 categories with 4-6 spots in each group in which I made my recipes to swap with the other participants. I have now decided I am going to add all my favorite recipes to my book in the same manner. (And this will be making only one of each recipe instead of multiples!) I just love having my recipes look so nice! Anyway, here are the recipes I did for this swap.
For the Appetizer category, I did Hot 'n Cheesy Crab Dip
Soup/Salad category - Bacon and Baked Potato Soup (YUM!)
Main Dish Category - Savory Chicken Pizza (So easy and yummy!)
Veggies/Side Dishes - Italian Bacon & Tomato Risotto (Not a true risotto - it uses rice, but very good!)
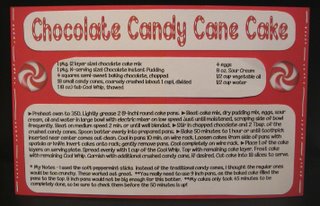
Dessert Category - Chocolate Candy Cane Cake (This is AWESOME and was a big hit at Christmas)
Beverage Category - Peachy Iced Tea Sangria
All the recipes are 5.5 x 8.5. I store them in a three-ring binder in page protectors. I can fit four in each protector. I'll probably have to add a second binder before too much longer. I made dividers for each category on full pages. I plan to add tabs to those as well to make it easier to flip to each group.
I usually just pop the page out that contains a recipe I'm using, so it stays safe from spills and splatters in the page protector. On most of the cards the entire recipe is on one side, so I don't have to remove them from the sleeve to use the recipe. I love my recipe binder full of colorful recipes!
Wednesday, March 07, 2007
Invitations for a Lingerie Shower
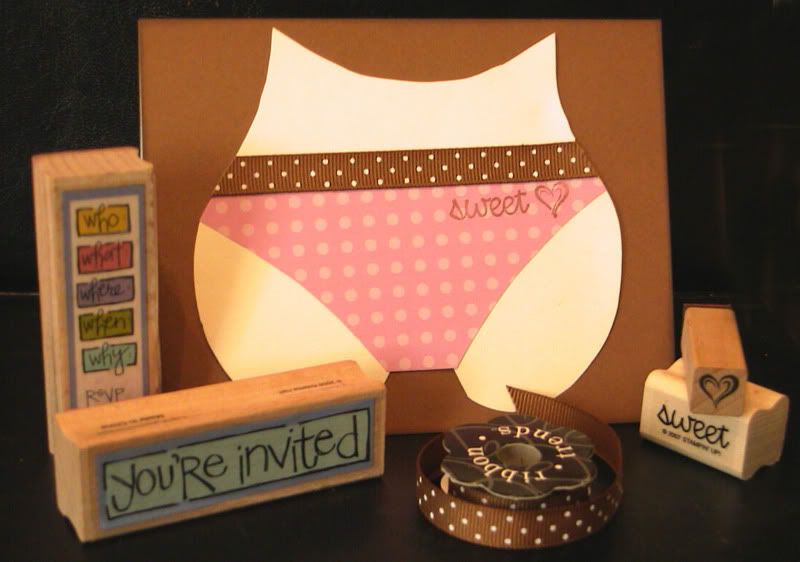
One of my very dearest friends is getting married, and I'm throwing her a lingerie shower (at her request). I saw this little card on Splitcoast Stampers and knew it would be absolutely perfect for the invitations. THIS IS NOT MY DESIGN! You can see the original here, and as you can see I CASEd it almost 100% because I loved everything about it! I used a different heart stamp, because I didn't have a smaller one, and my ribbon has polka dots. But everything else is pretty much the same.
The 'sweet' stamp is from the set 'So Very' by Stampin Up! The little heart is from a set by All Night Media, and the other stamps are $1 Stamps from Michael's (I used them on the inside.) The ribbon came from Hobby Lobby. I'm pretty sure the patterned paper is by Provo Craft. These were so much fun to make, and I hope everyone likes them!
Subscribe to:
Posts (Atom)